Pillow Cover-Cutting & Stitching
Previously, we have learned many things like half patta collar, umbrella flare lehenga, 4 tucks blouse, etc.
Currently, we will learn something very basic and easy.
We will learn the pillow cover-cutting & stitching.
Pillow covers can be made with borders and without borders.
Today let’s understand cutting with bordered overlap.
If the measurement is to be taken from a sewn(readymade) cover, then measure from inside seam to seam.
Here, we have to take two measurements for the pillow cover i.e. length and width.
- Let’s take an example,
- Length: 25″
- Width: 16″
- Considering overlap for length and extra for border means cutting the length to 60″.
- Length = 25″+25″+10″ = 60″
- Keep a 1.5″ border on both sides in width, so the width is 19″ for cutting.
- Width = 16″+1.5″+1.5″ = 19″
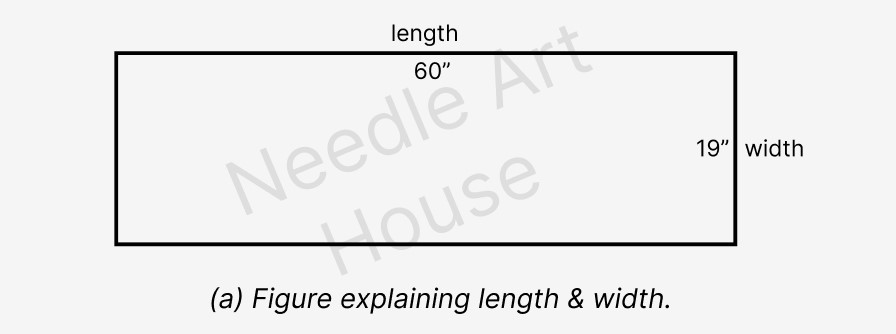
- If there is enough fabric, continuous cutting is done without joining another piece of fabric.
- If there is not enough fabric, then a fabric of 10″ in length may be taken.
STITCHING METHOD:
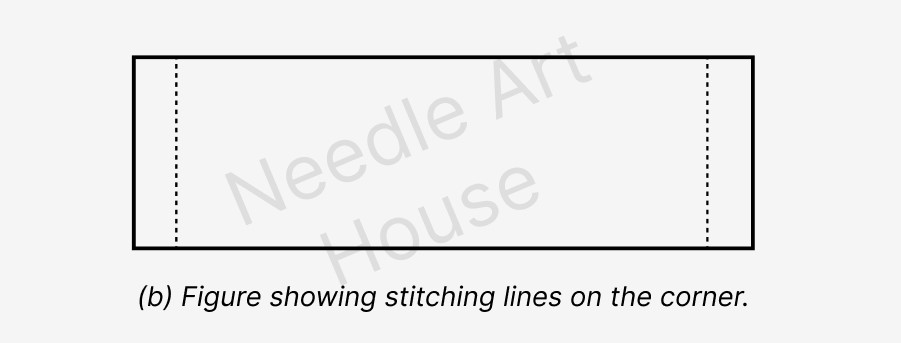
- Firstly, stitch in the corners on both sides, as shown in below figure(b).
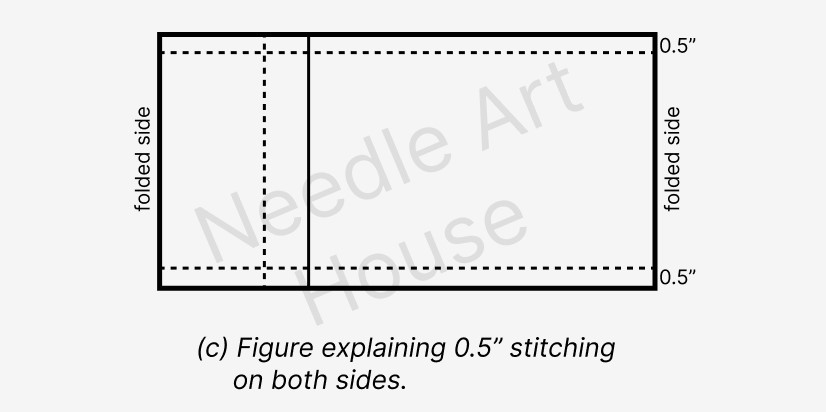
- As explained in figure(c), after sewing, arrange in overlap so that the fabric is straight inside, then sew in 0.5″ on both sides.
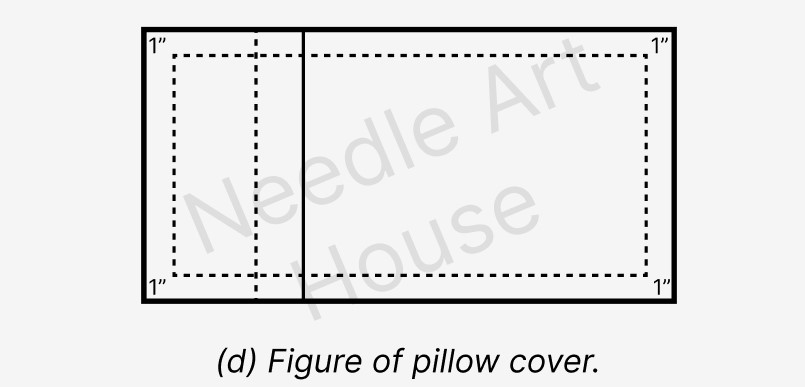
- Then straighten the pillow cover and sew all around leaving a 1″ border, as depicted in figure(d).
Other Objectives:
- The pillowcase has a zip on the backside.
- One can also use Velcro on the backside of the pillow cover.
Conclusion:
- I hope it helped to make an amazing pillow cover easily.
- If you have any doubt about any topic then let me know in the comment section.


You are doing well as well we need this stitching institution too please post the stitching institution mam
You can learn stitching method from our YouTube channel.
https://www.youtube.com/@NeedleArtHouse