Armhole Measurements & Explanation
If you are having trouble for a perfect fit for the armhole, then follow these easy steps.
In this session, we are going to learn a detailed explanation of the armhole measurements & explanation.
What is an armhole?
An opening in a garment, under the shoulder, through which the hand, and then the arm, passes.
How to measure the armhole?
Measure in the round near the joint of the hand.
How to take your armhole measurement?
Position the starting (zero) end of the tape measure flat against the center of your shoulder.
Draw the tape measure down over the front of your shoulder and arm, pausing once it hits the center of your armpit.
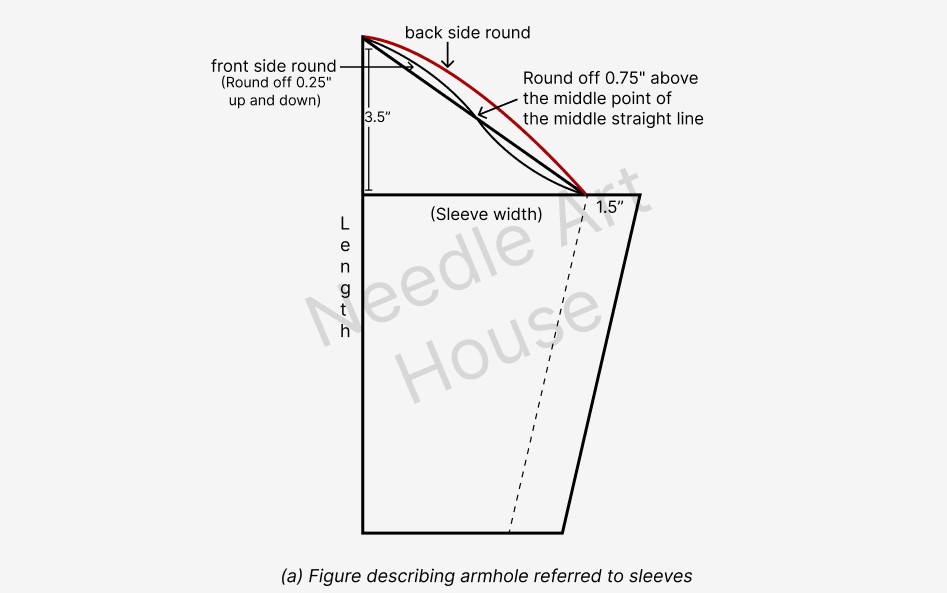
How can you tell the difference between the front and back armholes of a sleeve?
In general, the inner round indicates the front side and the outer round is for the back side, as shown in the figure(a) below.
For the full sleeve cutting method, you can check the sleeve cutting method.
Steps to be followed:
- Measurement of armhole round: 17″
- For armhole measurement, take 1/4 of the chest and deduct 2 from that.
- Say as an example, chest measurement is 36″.
- Armhole = 36″/4 = 9″-2″ = 7″
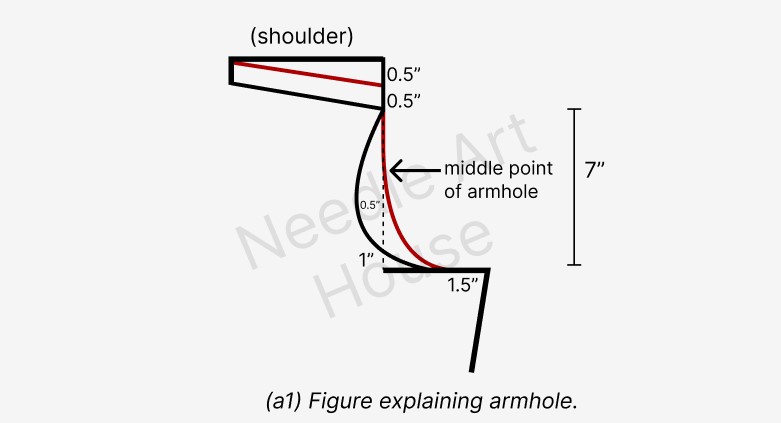
- Pointing 1.5″ extra for alteration(fitting) to draw the back side armhole circle, as shown in figure(a1).
- Then make the midpoint of the armhole and draw a circle.
- Point 0.5″ down from the top near the shoulder for the front side armhole.
- As suggested in figure(a1), pointing 0.5″ inward near the midpoint.
- Point 1″ from the bottom above the armhole line.
- Then draw the front side armhole circle.
- Where there is a 1.5″ alteration(fitting), keep both armhole circles in a straight line.
- While cutting, first cut the back side armhole circle and then the front side.
- Here, the black mark is for the front side armhole while the red mark is for the back side armhole.
Conclusion:
- I hope this session for armhole explanation will help you better for any stitch.
- If you have any queries, then please let us know in the comment section.

