Neck Pattern for Kurti
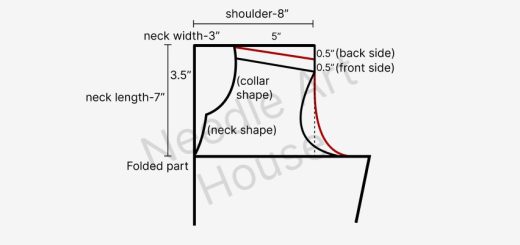
Firstly, we have learned the cutting method for kurti, let’s see how to cut and make a neck pattern in the most creative way for any regular kurti.
We can make different ways of neck patterns for kurti.
Here, we will take an example of a pan(leaf) shape pattern to make the perfect look for the neck.
Follow these few steps for the same:
- In the cutting of kurti, we take the width of the neck as 1/12 from the chest, that is, if there is a chest of 36″, then the width of the neck is 3″.
- Neck width = 36″/12 = 3″
- For the front neck, take the width of the neck as 3″ and keep the length as 5.5″- 6″.
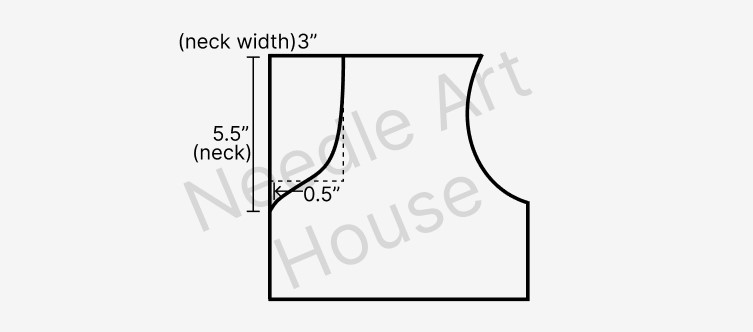
- Regular round neck length should be 5.5″.
- Keep 0.5″ more in a pointed neck like pan(leaf) shaped neck.
- Draw and cut the shape of the neck, and the shape of the cloth will come out like the figure below.
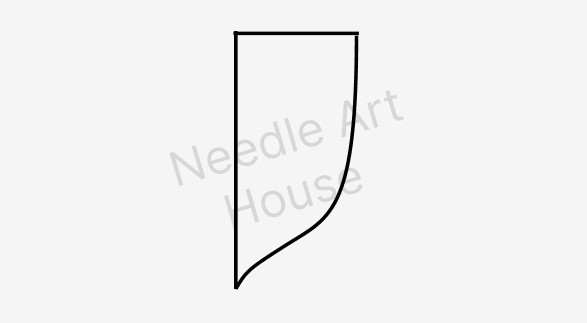
- Canvas is taken for making neck patterns.
- Keep the canvas on the folded side and place the cutting of that cloth of the neck pattern on top of the canvas and cut the shape.
- Then give a round shape of 1.5″ width and cut the canvas, as given in the below figure.
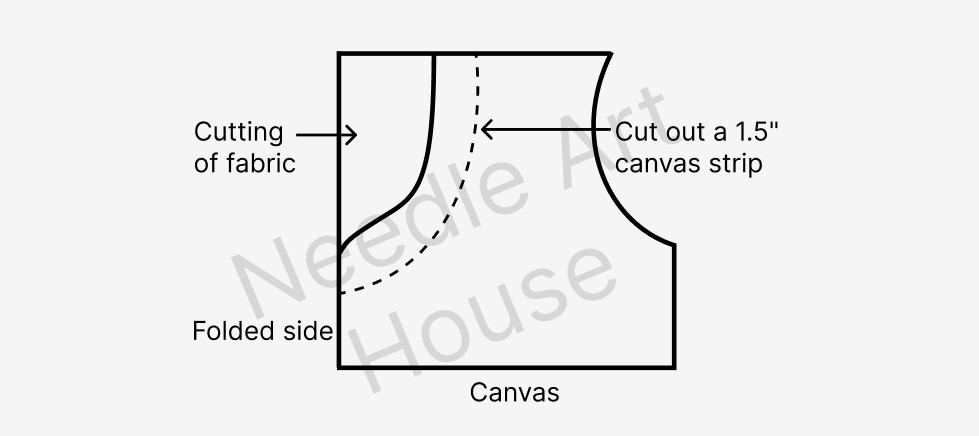
- Iron this and stick this canvas strip with extra fabric.
- Open the kurti as shown in the below figure.
- Then place the cut on top of the kurti and sew at 0.5″.
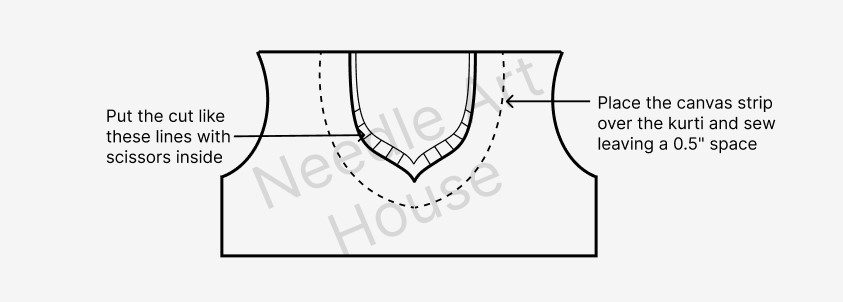
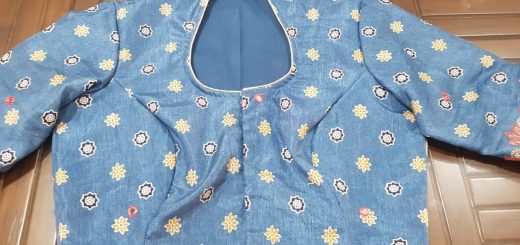
- The neck will be ready by placing a cut near the seam(stitch) and then turning the neck strip inside out.
Other Objectives:
- This is just an example of a particular neck but in this way, necks of different shapes can be made, as shown below.

- One can see variations in shapes in the design like u-shape, v-shape, etc.
- It is the most essential objective of kurti which can change the entire look of the outfit.
Conclusion:
- I hope you like this creative idea to make a neck pattern for kurti in an easy way.
- If you have any queries then let me know in the comment section.
- We will learn the stand collar neck pattern in the next session.
