Patta Collar – Cutting & Stitching
There are many different types of collars available in fashion.
We have already learned some of them like stand collar, halter(high neck) collar, shirt collar & blazer(coat) collar.
At present, we will learn about the patta collar-cutting and stitching method.
The basic method of cutting for the collar in kurti is the same.
Neck cutting is different for different collars.
The neck width is 0.25″ less in collared than the regular neck.
Let’s say, in a regular kurti the neck width is 3″ whereas in a collared kurti the neck width is 2.75″.
In a collared kurti, the back neck has to be cut by 0.5″.
Follow these few steps for the same:
CUTTING METHOD:
- Let’s take an example,
- Front neck length: 12″
- Let us understand the cutting of the neck of the front side.
- As shown in figure(a), a length of 10-12″ is to be taken for the patta collar for the front neck.
- Let us consider the length of the neck as 12″.
- Keep the top neck width at 2.75″.
- If we keep the length of the neck 12″ and the bottom width 0.75″, it can also be kept up to 0.5″-1.5″.
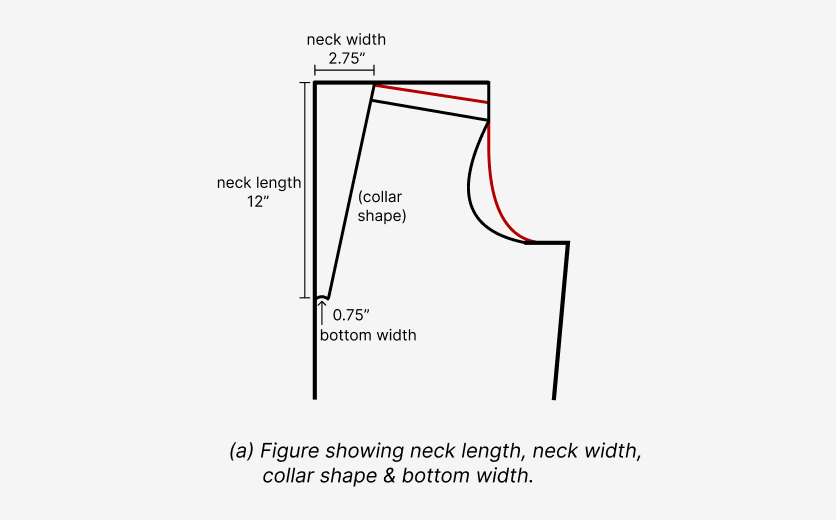
- The width and length of the neck below can be changed as you like.
- At the bottom, make a cut about 0.5″ where the width of the neck comes, referring to the below figure(b).
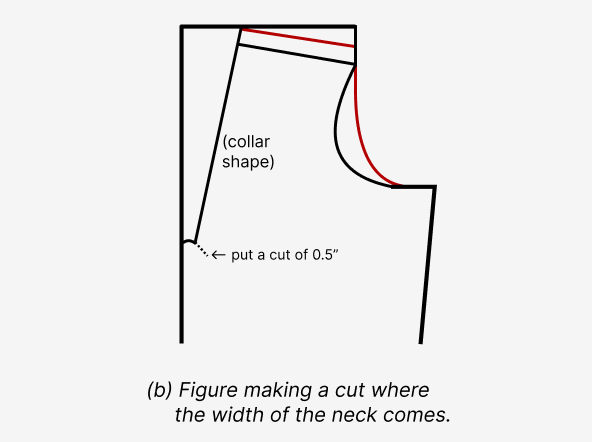
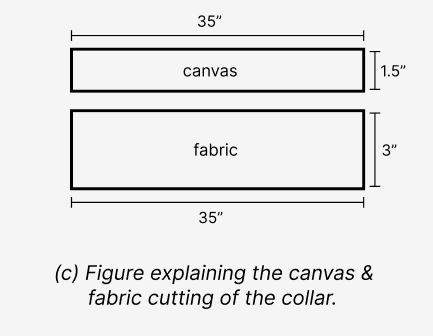
- A strip of canvas is cut directly for the patta collar.
- Measuring the entire neck after the shoulder joint.
- For the collar, cut a strip of approximately 35″ considering 1.5″ in width, as shown in below figure(c).
STITCHING METHOD:
- For stitching, first join the shoulder in the kurti.
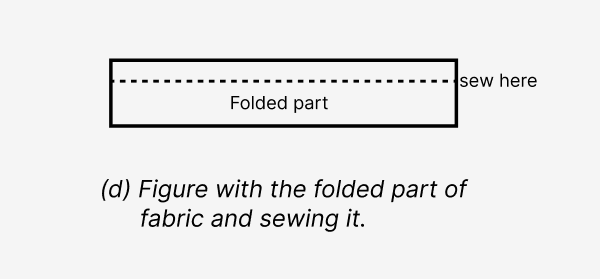
- Then prepare the belt(patta) of the collar by keeping the canvas between the fabric to prepare the belt(patta) of the collar.
- Keeping the folded part in the fabric, put a canvas in between and make a stitch, as shown in figure(d).
- Different designs can also be done in the belt(patta) of the collar.
- Then from the part where we cut the neck in the cutting of the kurti, put the belt(patto) of the collar on the front part of the kurti.
- Stitch around the entire neck and join the belt(patto) of the collar to the second cut.
- Then let both ends of the belt(patta) of the collar go inside so that the fabric will turn inward from the cut.
- Then sew up.
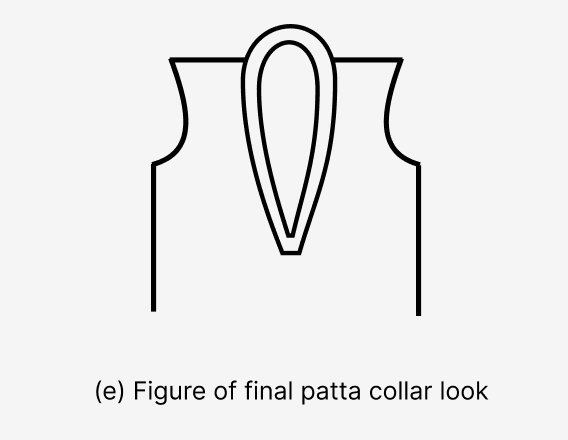
- Finally, below figure(e) shows the final look of the patta collar.
- After putting the belt, keep the length of the regular neck – 6.5-7″ and put a patch in between, i.e. put a separate fabric.
- If we keep 9-10″ while cutting the length of the neck, then there is no need to put a patch.
- You need to put a patch when the length is 12″.
- If we change the length of the neck and the width of the belt(patto) of the collar, then the look of the neck is different.
- Patta collars have the same pattern, varying the length can give different looks.
Other Objectives:
- Piping can also be done on the border of the patta of the collar, mirror can also be done in the patch in between.
- The patta collar is suited in a regular kurti, or knee-length one-piece.
Conclusion:
- I hope you like this creative idea to make a patta collar-cutting and stitching.
- If you have any queries then let me know in the comment section.
- In the future, we will learn about shirt (double collar) cutting method.

